Prior to coop construction, I considered several options and got ideas from a multitude of sources, including the following:
Build This Predator-Proof, Portable Chicken Coop for Your Backyard
Ebay: Coop Plans
Free Chicken Coop Plans
Snaplock Chicken Coops
Chicken Coop Plans, two sets! (Up to 10 chickens)
"Daisy" Coop w/ Run Building Plans (12 chickens): This coop has sufficient space for 8 chickens but not 12. My observations indicate that like tents and rafts, if a coop says it is sufficient for N number of chickens, it is really better suited for 0.75 * N.
Ware Premium Chick-N-Lodge
Williams-Sonoma coops
T100
Home and Garden Plans: This is the most awesome coop page I have ever seen
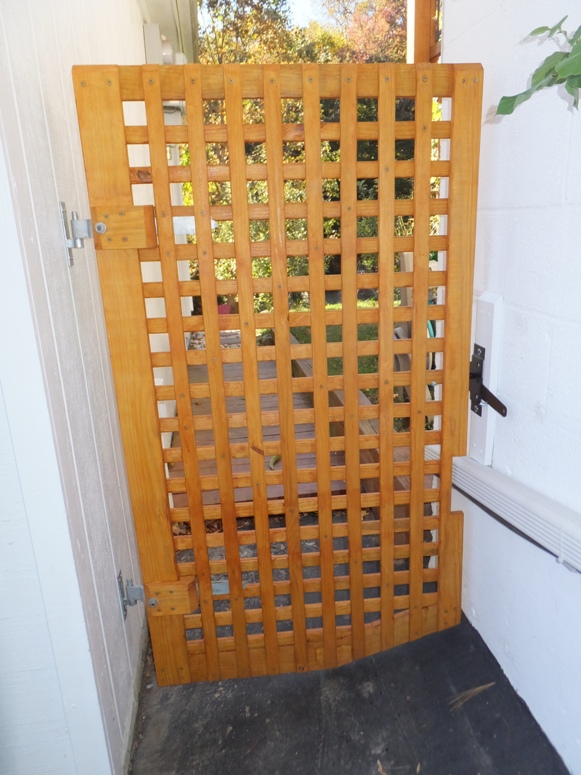
I really liked the coop I saw at the
Mother Earth News Fair in Seven Springs, Pennsylvania on September 21, 2013. It was elegant, tasteful, and functional...but far too small for eight chickens.
I initially wanted a
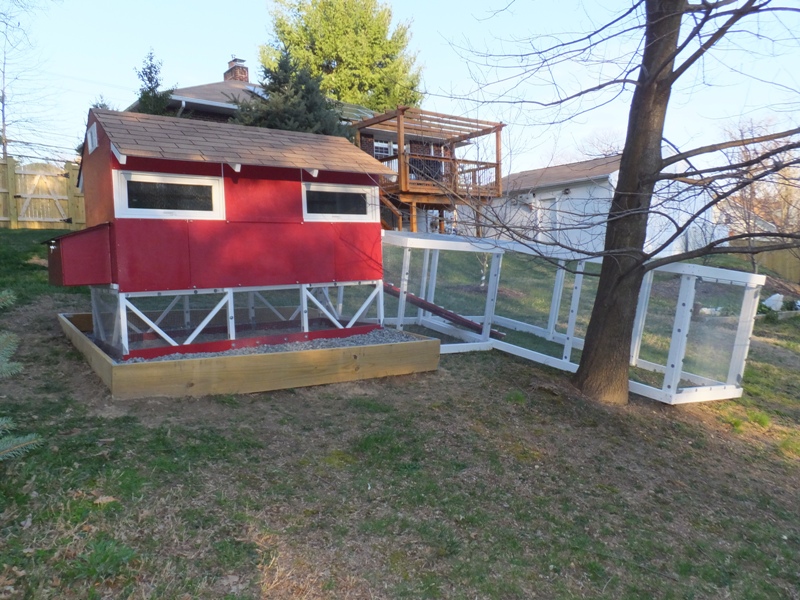
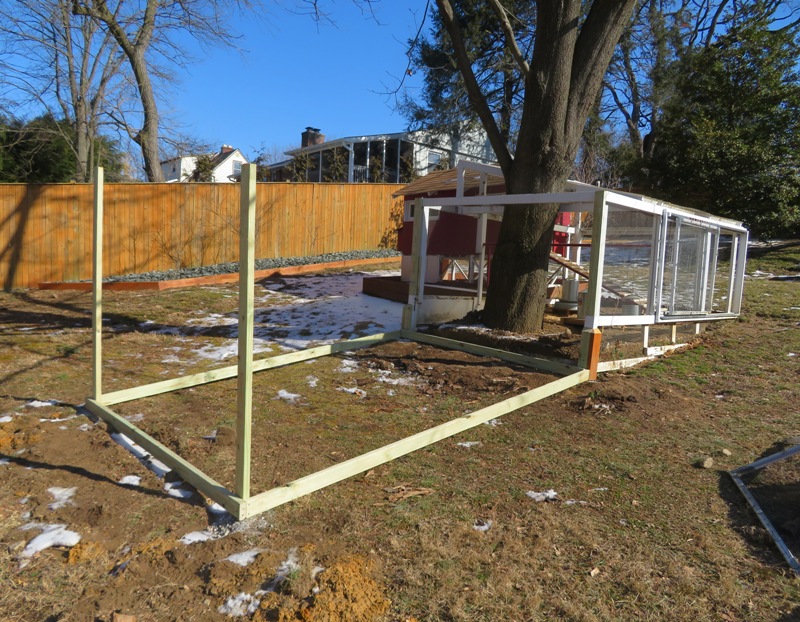
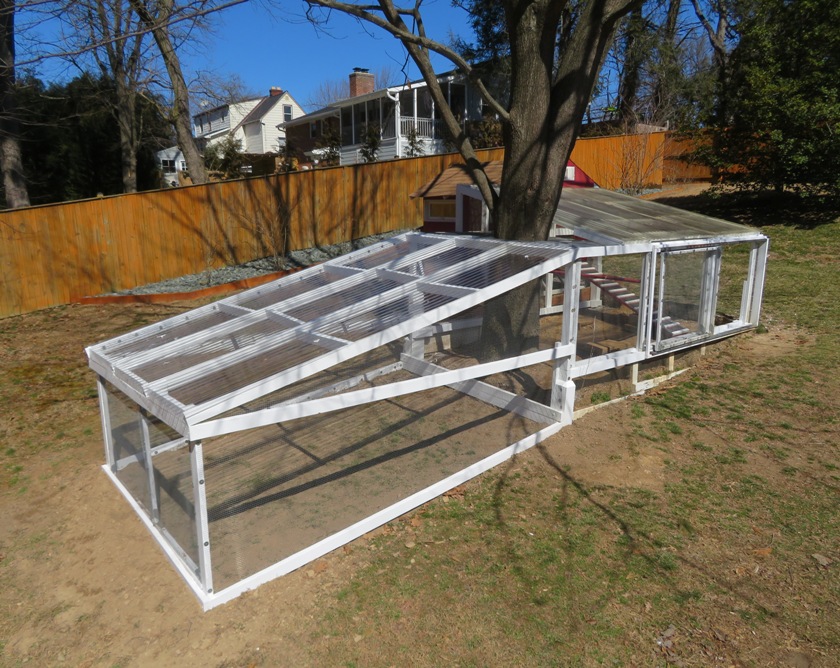
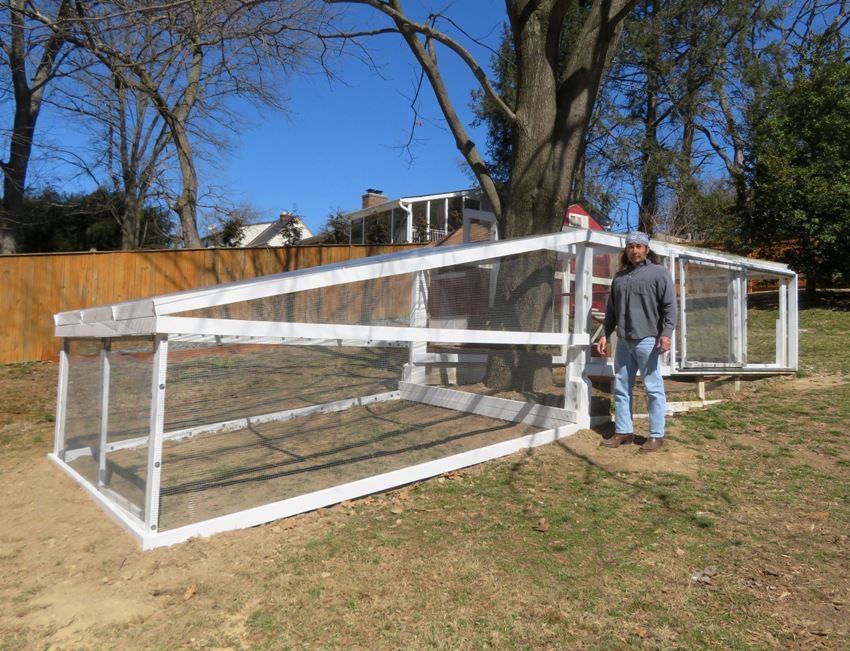
chicken tractor which is basically a mobile coop that can be moved to various parts of the yard so the chickens can fertilize different areas. I had a list of several other desired features such as off-the-grid, programmable, and powered by renewable energy. I got some of what I wanted, and for the things I didn't get...well, I learned a lot.
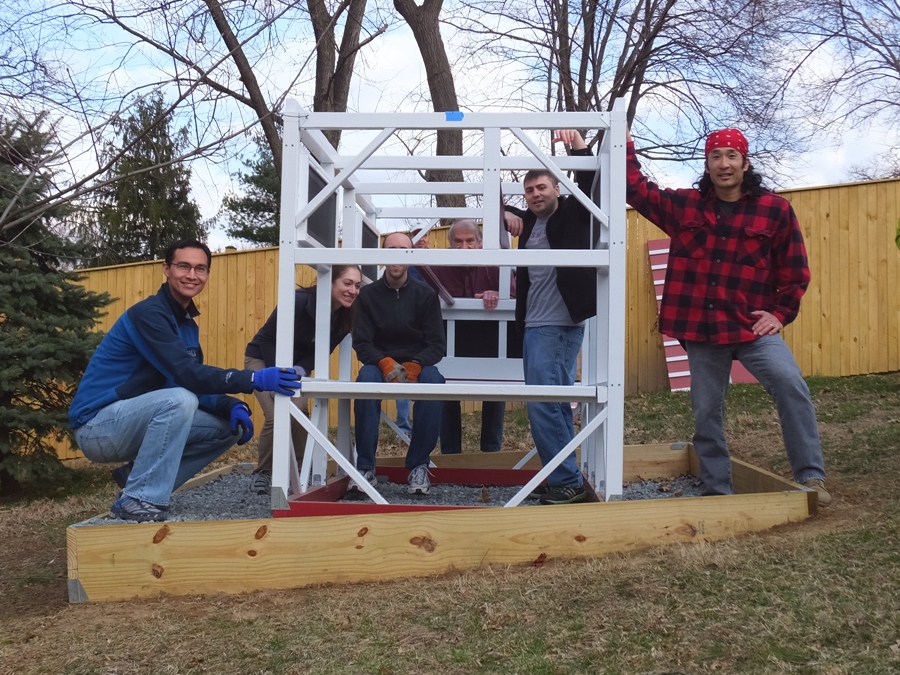
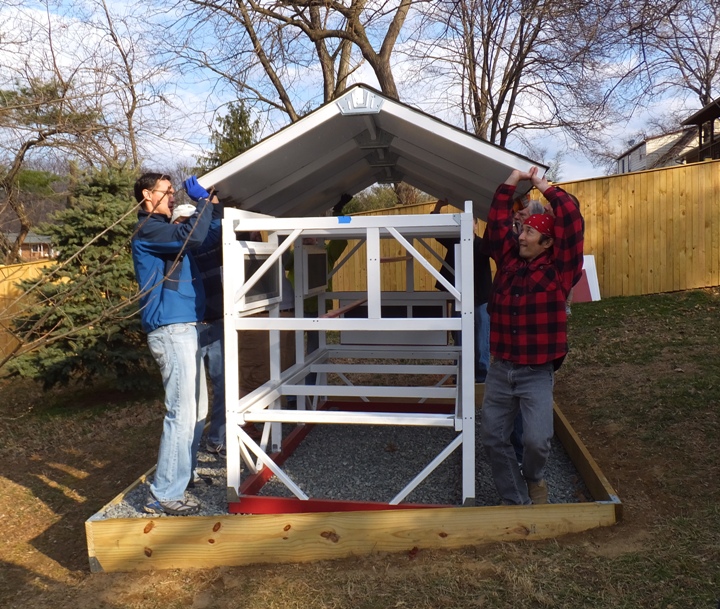
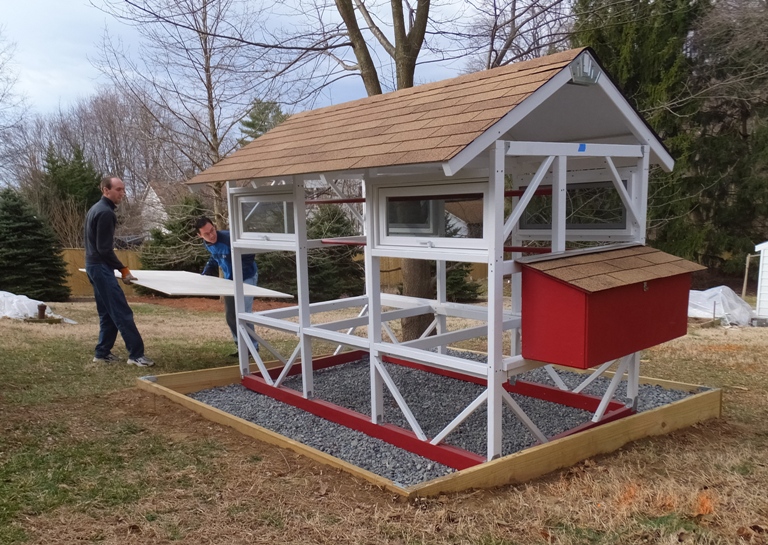
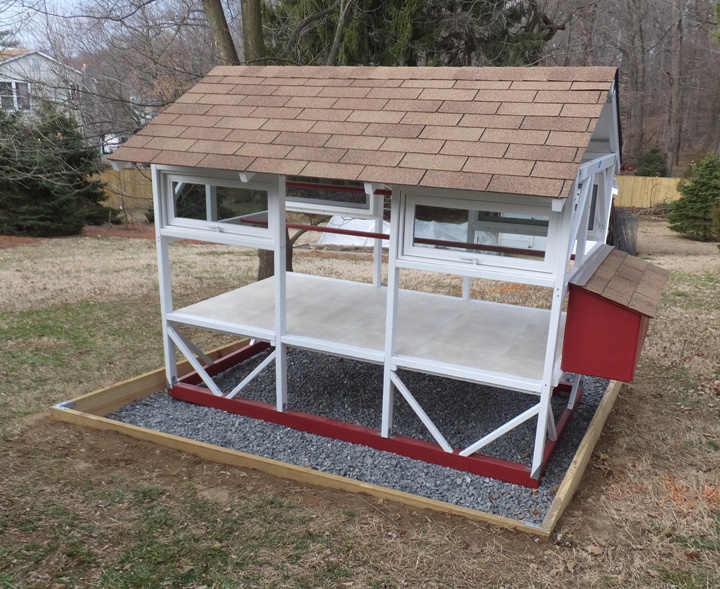
Since I couldn't find exactly what I was looking for, I decided to build my own coop, incorporating the ideas of others. And in my typical blogging fashion, I figured I could share some of what I learned. It was hard to find specific information to use as a basis for building my
Ultimate Howard County Coop. But digging deep (really deep), I found a lot of answers to my questions.
The following are my coop notes from 2013 and 2014. I got them from a variety of sources so sometimes there is contradictory information. If I found that to be the case, I generally tried to go with the dominant thought or middle ground. Quoted information appears in italics. I did my best to provide hyperlinks to my sources but the internet is a very dynamic place so many of these links broke over time.
Automation
Originally, my dream was to have an off-the-grid "smart coop." That doesn't mean I won't check up on the ladies at least once a day...it just means I don't have to rush home to close up the coop, wake up early to let them out at sunrise, or worry about them getting too hot or too cold.
In addition to a power source, I would need certain chicken geek products to make this work. Here are some things I looked into.
Arduino: A single-board microcontroller to make using electronics in multidisciplinary projects more accessible. See Arduino Chicken Coop by Roger Reed. Roger was generous enough to include his source code. Also see Arduino Chicken Coop Controller by Robot-Chicken and Hay River Software - Chicken Coop Controls.
SOlar Data AcQuisition (SODAQ): a multi-feature microprocessor board that lets you connect sensors and devices to the internet, quickly and with no fuss. It's designed for connecting things efficiently, running off-grid with built-in, ready-to-go solar power. I like the "SODAQ Moja complete."
Chicken Coop Mechanical Engineering
AirPi: An inexpensive pollution and weather monitor.
After I looked into things further, I decided to stay on the grid and only use automation for the door.
Door
The standard width of the door is 10 inches while the length is 13 inches [6].
12" x 12" opening-bottom should be a couple inches above floor. Hinged door - optional if coop is within secure area or connected to a run [24].
If you want to automate the opening and closing of the door, consider the following:
Amico DC 12V Digital LCD Power Programmable Timer
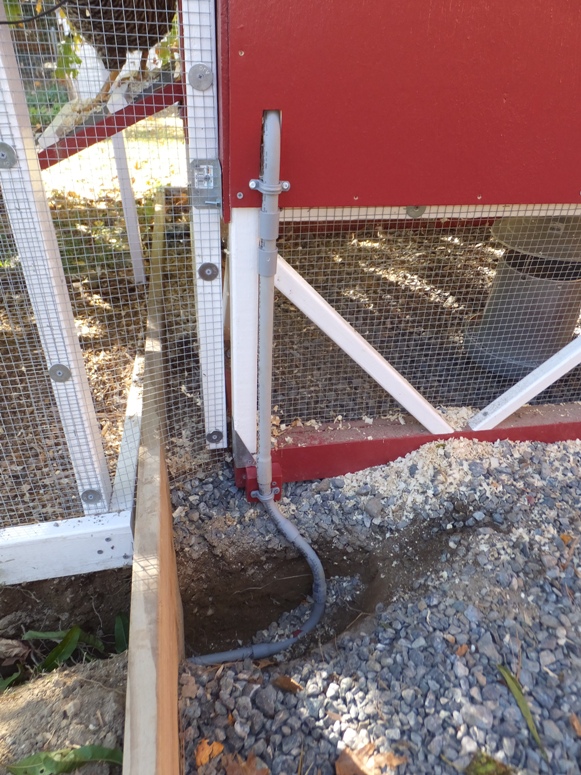
Chicken Coop Motor by Add-a-Motor: Automate your door. Note that the timer is not included. I ended up going with this and have been very pleased with it. The only problem is that the string sometimes breaks. After a few years, screws fell out, the plastic got cracked, and things were held together with duct tape but it kept on working. In 2023, I purchased a new one because the wire I used to replace the string got extremely tangled and I wasn't able to untangle it.
Dustbox
Outside, chickens hollow out a depression in dry ground and dust-bathe in it. Inside, they use the driest parts of the litter for bathing. But in case they have no other access to dust bathing - during a rainy spell, or when the litter is not fine enough - it's a good idea to furnish them a dustbox.
My dustboxes are simple edge-nailed plywood boxes, 24 inches square on the bottom, 16 inches deep, with 2-inch plywood strips around the top edges as a lip.
Fill with 4 inches or so of any dusty, nontoxic material, renewing it as needed. Sphagnum peat moss is excellent [15].
I ended up not providing them a dustbox. They free-range quite a bit and end up finding a suitable area to dust-bathe in our yard.
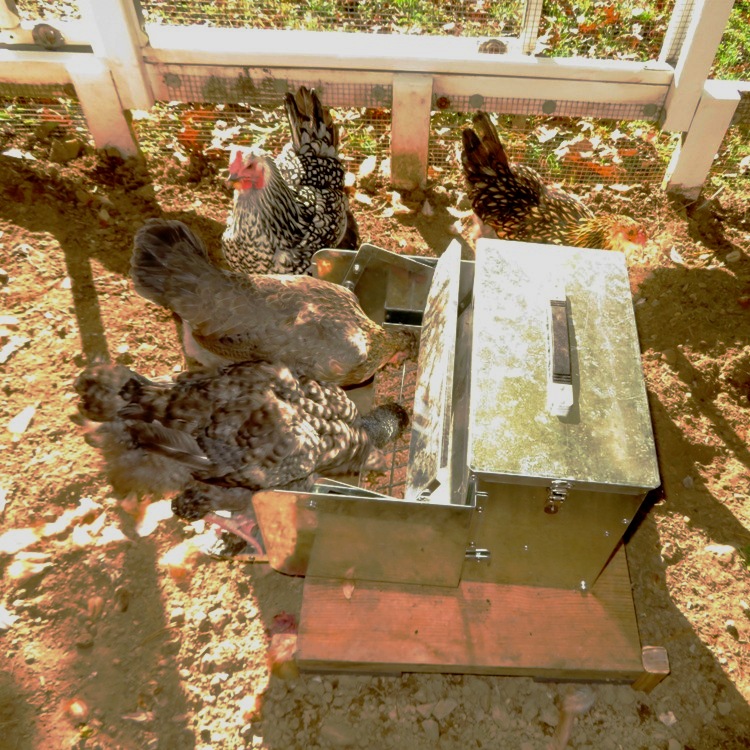
Feed
If you adjust the height of the feed basin to match their chest level and purchase a feeder with a rim that rolls inward, you can prevent the costly habit known as billing out [20].
Food attracts predators and pests such as mice and rats. While predators may not be successful getting to the feed, they can still cause property damage and stress the chickens trying [42].
Should one keep food in the coop, in the run, or both? What about water? I actually address water in a separate section but since the two are so related, I'll mention it briefly here as well. The simple answer is there is no simple answer. If you look at the forum pages, you'll see that lots of people try lots of different things and getting good results. If you have a chicken tractor, then you might want to keep the food and water outside the coop to offer your chickens additional space in the coop, which I suspect will be in high demand. You might also want to remove the food and water before moving the coop to avoid spillage and reduce the weight.
One of the best answers I've seen regarding where to keep the food and water is from a forum:
I keep the food in the coop and water in the run. When I let them out in the morning they hightail it to the water and give me dirty looks. They have free entry in and out during the day [3].
I ended up keeping both the food and water in the run. Keeping water out of the coop is important because the humidity should be low in the coop.
Floor/Litter
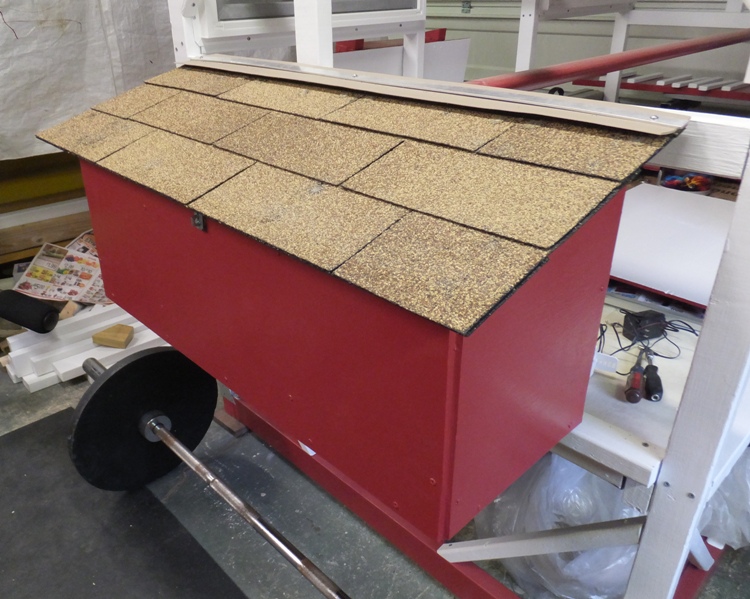
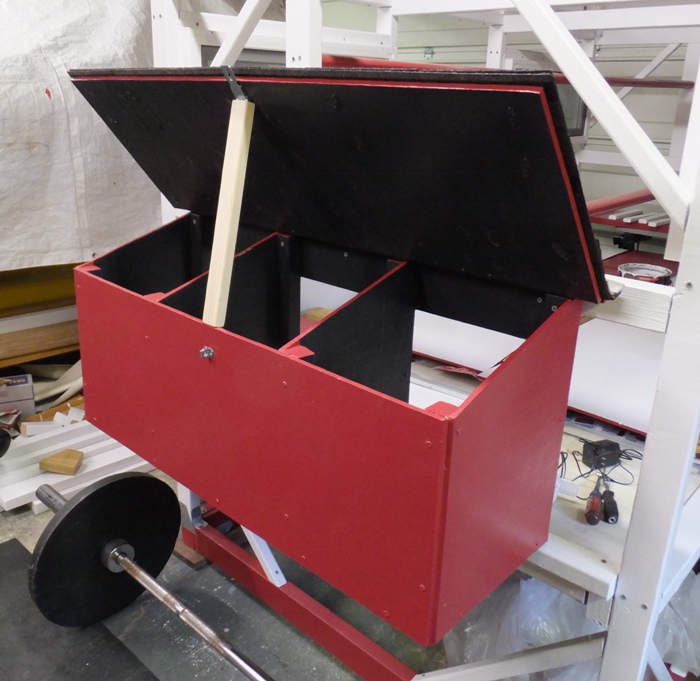
I like the idea of having a wood floor that can slide out for cleaning (i.e. droppings board). I've heard various sources say it should be made waterproof, which makes sense and is a requirement in some county zoning laws. I found some extra vinyl flooring material that I used to make the floor waterproof and easier to clean.
Begin a freshly cleaned coop with 4 inches of litter, adding an inch of fresh litter when the litter has lost its ability to absorb smell, becomes trampled down, or is noticeably soiled [20].
If you plan to use the
deep litter method, then make sure you can slide out your droppings board even if it has 10 inches of bedding on top of it. Or be prepared to remove most of the bedding before sliding out the board.
The deep litter method is one sustainable method of managing chicken litter in the chicken coop that many small farmers use. In the deep litter method, you're basically forming a compost pile of your chicken's poop right on the floor of the coop. You simply add enough shavings to keep the floor composting nicely, and the chickens do the aeration for you with their scratching behavior. Scattering corn on the coop floor encourages them. The litter has beneficial microbes - think of it as probiotics for your hens.
Once or twice a year or less, you clean the coop out.
If you have a wood or other floor...you'll have to compost the litter when you clean it out before using it, because the earth supplies the moisture and culture to start the composting process [16].
Based on my readings, it sound like the deep litter method works best over an earth floor.
If you are going to build from scratch, my strong recommendation is to leave an earth floor in the coop. Not only will you save the expense of framing and installing a floor, but you will be ready to create the conditions for best manure management [15].
Deep litter insulates chickens in the winter and lets them keep cool by burrowing in on hot summer days. Start young birds on a bedding a minimum of 4 inches deep and work up to 8 inches by the time they are mature.
Under droppings boards, after each cleaning spread at least 2 inches of litter beneath the boards to absorb moisture from manure and make it easier to scoop up [23].
A very good source for additional information about the deep litter method is the "Composting Litter" section in the "Routine Management" chapter in
[23].
How much litter does one need?
Shavings = 9 pounds per cubic foot
Need 6 cubic feet to cover 24 square foot floor 3 inches deep [24].
This equates to one cubic foot of shavings to cover 4 square feet of floor. I'll have a 32 square foot floor so that means 8 cubic feet or 72 pounds to cover it 3 inches deep.
Shavings absorb 2 pounds (1 quart) of water per 1 pound of bedding [24].
That means the 3 inch deep bedding covering 32 square feet will weight 72 + (72 x 2) = 216 pounds. If we use the deep litter method and let this get up to 8 inches deep, then we're looking at 8/3 x 216 = 576 pounds! My idea of having a chicken tractor just keeps getting heavier and heavier. Maybe I should rethink using the deep litter method for such a large chicken tractor.
For henhouse flooring, use
3/4" exterior-grade plywood or concrete [and]
3" deep absorbent litter [24].
Three or four inches of litter or nesting material, changed regularly, keeps the area clean and odor free [20].
I ended up not going with the deep litter method.
Heating and Cooling
In harsh winter climates, a heat lamp may be placed above the roosting area to prevent frostbite to the chickens' combs and wattles. It needs only to be used when temps drop below 15 degrees or so [2].
If you are expecting temperatures just a little below freezing, you probably won't need to take any special precautions for your flock. The exception would be bantams or other small breeds. Because of their smaller body size, these birds should be provided with supplemental heat at temperatures or wind chills of 32 degrees or below. Other breeds should be hardy to about 20 degrees, plus or minus depending on wind, coop quality, and number of birds in a coop [9].
One woman out in Wyoming even says heat lamps are not needed when it gets down to 40 below zero! See
[64].
At the other extreme,
All breeds need supplementary heat if temperatures drop below 60 degrees Fahrenheit [20].
However, this same source later contradicts itself.
Add a heat lamp or small heater over the roosting area when temperatures dip below 45 degrees Fahrenheit [20].
Combs and toes are most susceptible to frostbite in extreme cold. Having a roost that is sufficiently wide allows feathers to more easily cover the feet. For the comb,
a coating of petroleum jelly in extreme conditions...[helps] conserve moisture and heat and prevent[s] cracking [9].
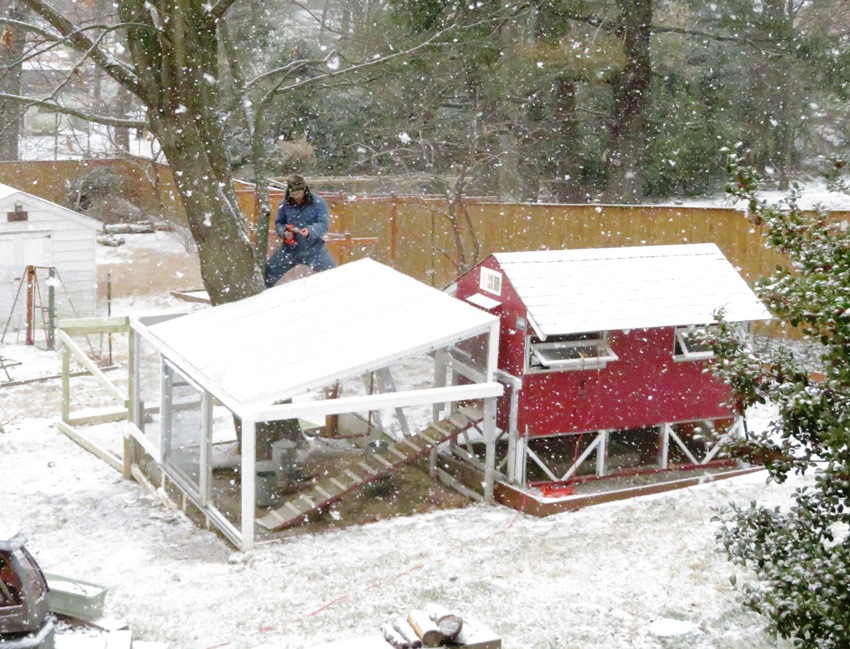
Our 2013/2014 winter was really harsh. I didn't have any chickens then but I did ask some people I know in the Baltimore area if they were providing supplemental heat for their chickens. I got mixed answers. Despite how cold our Baltimore winter is (lows under 5 degrees, without wind chill factored in), places like Michigan are much colder. Out there, Shannon Cole claims
We do not use heat lamps or any type of coop heater with the exception of a heated waterer [45].
While cold is a danger, moisture and cold is a greater concern. Rebecca Nickols writes
...my flock enjoyed free-ranging in a 40 degree Fahrenheit drizzling rain and returned to the coop that evening with their feathers soaking wet. That night the temperature took a dramatic drop to 7 degrees Fahrenheit! It was the moisture, added to the freezing temperature and lack of acclimation to the cold, that increased the chance of frostbite [46].
The optimum temperature for chickens is between 45 and 80 degrees Fahrenheit [20].
Minimize coop space for wintered chickens, add insulation, and keep the area draft-free to cut down costs [20].
Be sure to close the windows about the time of your first killing frost to stop any cold drafts, and then open or uncover the windows when it's warm enough to plant early spring crops, such as peas, greens, and potatoes [63].
A simple way of protecting your birds from chilling overnight is to send them to bed with a full crop [9].
Contrary to what I originally thought, chickens are more prone to having problems with heat than cold.
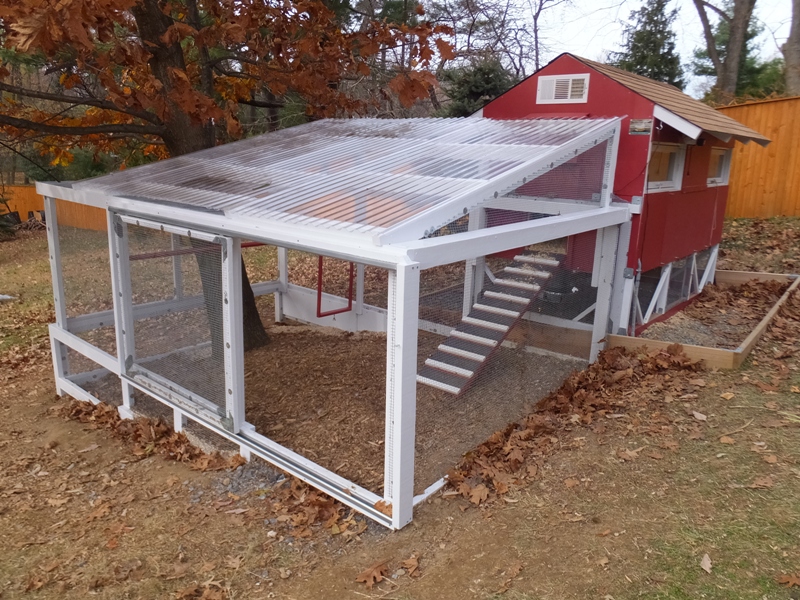
To keep the shelter from getting too hot, treat the roof and walls with insulation, such as 1.5 inch Styrofoam sheets, particularly on the south and west sides. Cover the insulation with plywood or other material your chickens can't pick to pieces.
Using a heater for mature chickens won't do them any favors. In a properly constructed shelter, chickens can keep sufficiently warm if they aren't wet or sitting in a draft [23].
Insulating the roof and walls also reduces summer heat gain and moisture accumulation
[24].
When temperatures climb into the high 70s, air will need to move freely and regularly through the coop [20].
Chickens aren't capable of sweating and can go downhill pretty quickly in temperatures over 95 degrees. You'll know they are too hot if you see them panting [17].
A wall-mounted fan sucks stale air out, causing fresh air to be drawn in. The fan, rated in cubic feet per minute, or cfm, should move 5 cubic feet of air per minute per bird.
A barn fan or agricultural fan is recommended since
a fan designed for use in your home won't last long in the dust and humidity generated in the normal chicken shelter [23].
A chicken's body operates most efficiently at an effective ambient temperature between 70 and 75 degrees. In cold weather, they eat more to obtain the additional energy they need to stay warm. Hot weather is more problematic.
Egg production may rise slightly, but eggs become smaller and have thinner shells. When the temperature exceeds 95 degrees, birds may die [23].
What about heat lamps?
DON'T use heat lamps inside the coop. There is no way to use a heat lamp safely inside a chicken coop. Any chicken can fly into a heat lamp, catch its feathers on fire and incinerate the entire flock and coop. If you cannot be persuaded that chickens do not need supplemental heat inside a properly managed chicken coop in the winter, find a safe heat source such as a flat panel radiant heater that brings the temperatures up just a few degrees. There should not be an extreme difference in heat between outside temperatures and temperatures inside the coop [25].
Clearly, you will get a wide variety of answers when it comes to providing supplemental heat for chickens. I ended up not choosing to do so. There are plenty of people that live in colder places than me that do not heat their coop and their chickens do just fine.
Height
In regions with strong winds, keep the coop less than 4 feet high and stake it well [15].
I'm guessing much of this depends on the shape of the coop and the size of the base. An A-frame coop should withstand winds much better than some other designs. I would want my coop to be bottom-heavy and/or at least have a base that covers more ground than the height.
According to the "Henhouse for 6 Birds" slide at
[24], the henhouse below the roof can be 5'6" high with 4' allowed for the interior of the coop and 17" allowed for a feeding and watering area below the coop.
Lighting
Without a light bulb in the coop, chickens will stop or slow down laying when daylight drops below 14 hours a day [2].
Maximize production with 14-16 hours of "daylight." Provide two (one is a spare) 15-25 watt light bulbs on timer [24].
This slide does not mention the size of the space that this lighting serves but other slides often reference a residential coop for 6 chickens.
For peak laying productivity, augmentation should start when daylight falls below 15 hours per day, usually in September.
If you forget to turn the lights on for even one day, your hens may go into a molt and stop laying [2].
The avian reproductive cycle, which is how a hen produces eggs, is stimulated in poultry by increasing day length. As day length approaches 14 hours per day during early spring, chickens begin laying eggs, gradually increasing their production as the day length increases. They will reach their maximum egg laying potential when the day-light reaches approximately 16 hours per day. Nature utilizes this characteristic so that chicks will hatch in the spring and have the warmer months of summer and fall to mature before the harsher winter season arrives. By providing artificial light, growers can manipulate this natural cycle to their advantage and increase the egg laying potential of their flocks.
As mentioned above, approximately 14 hours of light per day is required to stimulate a hen to lay an egg. Anything below that will cause her reproductive cycle to shut down, triggering the hen to cease egg production until spring when the natural day length will increase to sufficient levels once again. Any supplemental light should be added during the morning hours, as sudden darkness can cause chickens to panic and pile up in a corner, which can consequently cause them to suffocate each other. By applying extra light in the morning rather than the evening, chickens will naturally go to roost with the setting of the sun [40].
Although a light-day of 11 to 12 hours will initiate egg production, this amount of light is not sufficient for sustained, high production. Poultry keepers who had great expectations regarding fresh eggs for the table become disillusioned. When natural day length falls below 15 hours per day, this is the time for the lights to come on!
Regardless of which lighting system was used during the growing period, pullets should be on a schedule of increasing light by the time they are 20 weeks of age. For the heritage breeds it may be preferable to wait until 22 weeks of age. When you provide artificial light, do it in an orderly manner. Don't confuse your birds by changing their day length from 10 hours of light to 13 hours of light all in one day. Birds can be given an increase of 15 minutes each week (some authorities recommend 30 minutes per week) until they reach 14 to 16 hours a day. Some breeders suggest a total of 16 to 17 hours daily. Please note that light periods longer than 17 to 18 hours may actually depress production.
You can set your timer so that birds receive light in early morning until sunrise, and then again in the afternoon at sunset. This will save a bit in electricity costs. On the other hand, an advantage to adding all artificial light during morning hours is that it allows the birds to naturally go to roost with the setting of the sun.
Laying birds must never see a drop in day length. If you are flicking the switch by hand and forget to turn on lights for just one day you may see a drop in production. If the power is out for two days or more the birds may go into a molt, which can affect production for up to six weeks.
If birds seem nervous and flighty, try reducing the level of light by using a smaller bulb size. Nervous birds may resort to cannibalism and egg eating. Tossing them a handful of scratch grains or birdseed in late afternoon helps to keep down boredom and helps to keep the litter stirred. Make an arrangement with your local market to obtain their discarded vegetables and add a few chopped greens such as chard, lettuce or spinach. These items not only reduce boredom but they make for nice dark yellow yolks [37].
I checked to see when daylight falls below 15 hours per day in Baltimore. The answer depends on how you define "daylight" since one can pick the time between sunrise and sunset, astronomical twilight, nautical twilight, and civil twilight. I'm going to choose the latter:
Civil twilight is defined to begin in the morning, and to end in the evening when the center of the Sun is geometrically 6 degrees below the horizon. This is the limit at which twilight illumination is sufficient, under good weather conditions, for terrestrial objects to be clearly distinguished; at the beginning of morning civil twilight, or end of evening civil twilight, the horizon is clearly defined and the brightest stars are visible under good atmospheric conditions in the absence of moonlight or other illumination. In the morning before the beginning of civil twilight and in the evening after the end of civil twilight, artificial illumination is normally required to carry on ordinary outdoor activities [26].
The time between sunrise and sunset is shorter than civil twilight hours while astronomical and nautical twilight hours are longer. Chickens don't have good night vision so I figure they should be in the coop once civil twilight is over.
But going back to what I was originally describing, in Baltimore, we get less than 15 hours of civil twilight from August 7, 2014 to May 5, 2015, inclusive
[27]. So if you want optimum egg production, you'll need to turn on a light to provide supplemental lighting during these dates.
All light bulbs are not the same.
You can use either incandescent or fluorescent bulbs. Fluorescent bulbs are less expensive to run and, since they use less power, are more eco-friendly, but be sure that you get the ones labeled "soft white." Counterintuitively, fluorescent bulbs labeled "daylight," imitating the appearance of sunlight, have a cooler color temperature and will not stimulate a chicken's reproductive system [2].
Should the choice be made to use a fluorescent fixture, a "warm" wavelength bulb (appears as orange or reddish light) must be used since the "cool" wavelength bulbs, which are commonly used in offices and households, will not stimulate the hen's reproductive cycle. Light fixtures in the coop should be placed above feeders and waterers, and care should be taken to avoid having areas in the chicken house that are shaded from light [40].
Although incandescent bulbs have long been used in lighting for poultry, there is an increasing use of fluorescent bulbs, just as in household use.When using fluorescent fixtures, choose "warm" wavelength bulbs, which emit more rays at the red-orange wavelength. The "cool" bulbs commonly used in homes and offices are less stimulating. If you are depending on just one bulb, be sure to check it daily and replace it immediately if it should burn out. Keep in mind that the shadows cast by equipment, cages, and dropping boards will cut down on light efficiency. In addition, dusty bulbs can cause a real decrease in intensity.
One 60-watt incandescentbulb with reflector, 7 feet off the floor in the center of a 12- x 12-foot pen, provides 2 to 3 foot candles (fc) of light, in the absence of any natural daylight. A 25-watt bulb in the same location should provide 0.5 fc of light. The conventional industry level is about 0.5 fc or less, similar to a moonlit night. However, most small-scale producers would prefer a somewhat higher level of light - a 60 to 75-watt bulb. [37].
The wrong bulb can kill your chickens!
Some of these bulbs may be labeled Teflon-coated, Tefcoat, Rough Surface, Protective Coated, Safety Coated, etc. The coating helps make them shatter resistant. The problem is when Teflon is heated it creates a toxic gas. PTFE is also associated with the brand names Teflon, Rulon, Chemfluor [38].
I have not given my girls supplemental light to stimulate their egg laying. I have read that it is good to give them a rest from constant laying but if maximum egg production is your goal, then I would definitely consider supplemental light.
Nesting boxes
Plan on one nesting box for every 4-5 hens [8].
One box per four hens is plenty and one per 2-3 hens is bordering on excessive [4].
The henhouse should contain some simple nest boxes, ideally one for every three laying birds you intend to keep [19].
Nesting boxes can be placed anywhere in the coop. They should be at least 18" square [2].
We suggest you provide one nest box for every three hens. They should be about 12 inches high, 12 inches wide, and 12 inches deep [9].
Chicken nests should have a depth of 13 inches, a width of 12 inches and a length of 15 inches [6].
Each box should measure 12 inches square and be around 14 inches high [18].
Provide one nest for every 4-5 hens.
12"x12" in size.
Place on west or east wall for south facing coop [24].
To improve egg production, the nesting boxes should have a width of 12 inches. The height of these amenities should be nine inches while the depth should be 12 inches. These dimensions are helpful in preventing undesirable behaviors of the animals such as fouling the boxes as well as scratching the materials inside the nests. The entrance should be nine inches wide and six inches high. Having small entrances is cost efficient since the light inside the boxes is lessened, which is very good for egg production. Additionally, small entrances hold straw in place and ensure that the eggs will not roll out. Above all, small boxes reduce the chances of having pecked and cracked eggs [7].
Windows and doors [I suppose nesting boxes too] need to be secured with latches or locked clasps. We have found the most useful type of latch to be the spring-loaded hook-and-eye design. Whatever you choose, select something that is unlikely to be opened by a lucky swipe of a paw or snout. As a general rule, use something you need thumbs to operate [9].
Consider the
Stanley-National Hardware 2 in. Safety Gate Hook.
A rail just below the entrance to the nest gives hens a place to land before entering. For most chickens the rail should be no closer than 8 inches from the edge of the nest [23].
If bird droppings are befouling the effs, it's likely that the rails the hens roost on are too close to the nest itself, causing their droppings to land smack dab on the eggs. Alleviate this problem by making sure the rail is no closer than 8 inches from the nest edge [13].
A 4 inch sill along the bottom edge of each nest prevents eggs from rolling out and holds in nesting material [23].
One can use hay or straw in the nest boxes
[16].
The boxes should be placed just off the ground and in the darkest part of the house (usually under the windows), as chickens prefer a quiet, dim place in which to lay their eggs. Straw or hay make a good liner, but it will need to be cleaned out regularly and dusted with louse powder [18].
At the other extreme,
A height of 2 feet from the floor might be easiest for the hens [20].
...and nest boxes
should be located 18-30 inches from the floor. You can figure 7 hens per nest [21].
Furnish one nest for every 4 to 5 hens in your flock. A good size for Leghorn-size layers is 12 inches wide by 14 inches high by 12 inches deep. For heavier breeds, make nests 14 inches wide by 14 inches high by 12 inches deep [23].
Somewhere in between I got this answer:
Place nests on the ground until your pullets get accustomed to using them, then raise the nests 18 to 20 inches off the ground by setting them on a platform or firmly attaching them to the wall [23].
Orientation/Location
How should the coop be aligned?
The below mentions that orientation should be set to take advantage of prevailing winds to maximize ventilation. But keep in mind that this was written for poultry houses in Oklahoma, which is roughly on the same latitude as North Carolina (i.e. much further south than Maryland).
The prevailing wind direction is also important from another standpoint. In order to maximize benefit from natural ventilation, the poultry houses should be oriented with the long side exposed to the wind. In Oklahoma, that means the house should be oriented east-west. This directional orientation has another benefit; it minimizes the amount of sunlight which enters the house in the summer months. In contrast, during the winter months when the sun is lower on the horizon, sunlight through the windows can help warm the house. Information about specific prevailing wind directions can be obtained from the National Weather Service. In some locations topography dictates the direction of the house, but if choices exist, the east-west orientation is suggested [51].
In the Baltimore area, prevailing winds generally come from west by northwest.
January wind from WNW at 10 mph
February wind from NW at 10 mph
March wind from WNW at 11 mph
April wind from WNW at 11 mph
May wind from W at 9 mph
June wind from WNW at 8 mph
July wind from W at 8 mph
August wind from W at 8 mph
September wind from S at 8 mph
October wind from NW at 9 mph
November wind from WNW at 9 mph
December wind from WNW at 9 mph
[52].
When it comes to location of the coop, there are certain characteristics one should look for in most situations:
Shade during the hottest part of summer days
Good drainage
Good ventilation
Maximize winter sunlight
Regarding nesting boxes, one should
Place on west or east wall for south facing coop [24].
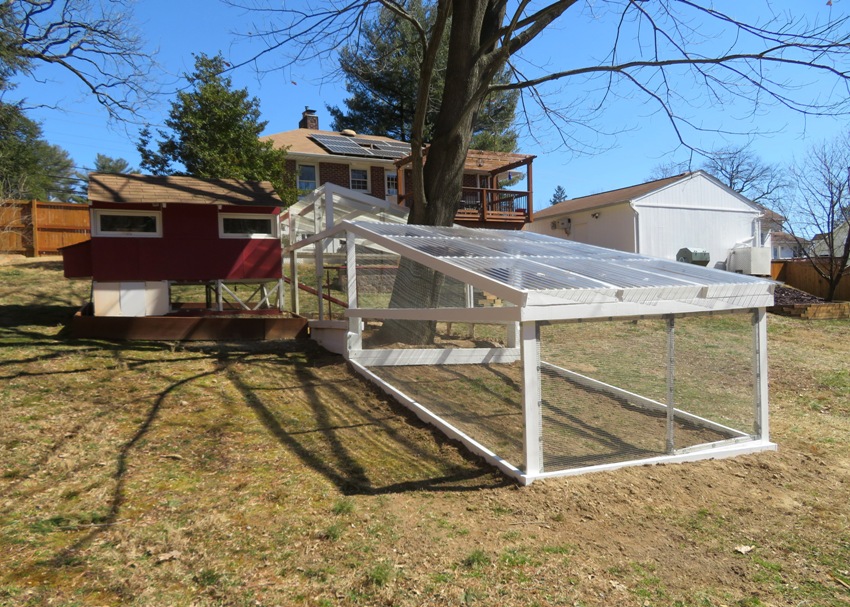
Paint
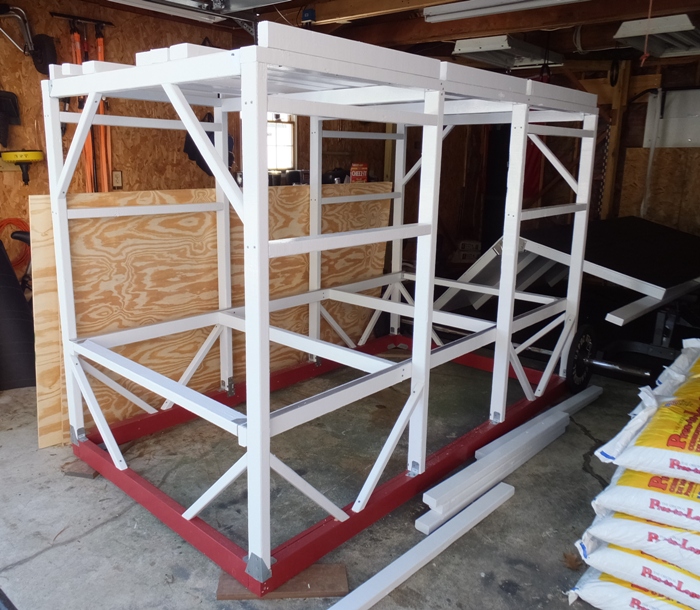
The quality of the paint wasn't something I considered too heavily until I realized that a chicken tractor made for 8 hens can get quite heavy. To reduce weight, I decided to use 2x3 lumber instead of 2x4. The problem is that I have not seen 2x3 pressure treated lumber for sale...only untreated. I won't have the 2x3s touching the ground but they will be exposed to the rain so it is very important they be protected. That is where a good paint comes in.
At Home Depot, I was told the best paint they have for outdoor use is the Behr Marquee. It supposedly has exceptional resistance to dirt and fading. It is a paint and primer in one, which makes about as much sense to me as having shampoo and conditioner in one (i.e. I don't understand). At $48 or $49 per gallon, it is quite expensive. If you go that route, I think the "Reddest Red QU-06" is as close as you'll get to barn red. I've heard that one should not use Behr paint in a sprayer.
In the past, I've used
Valspar 15 year Severe Weather exterior latex semi-gloss white 47531. Both our garage and shed are painted with it. It is an extremely easy paint to work with. Unfortunately, it is no longer available. I hate when paint companies deprecate a color.
Chat rooms seem to indicate
Sherman Williams is the best but I don't have any experience with their products.
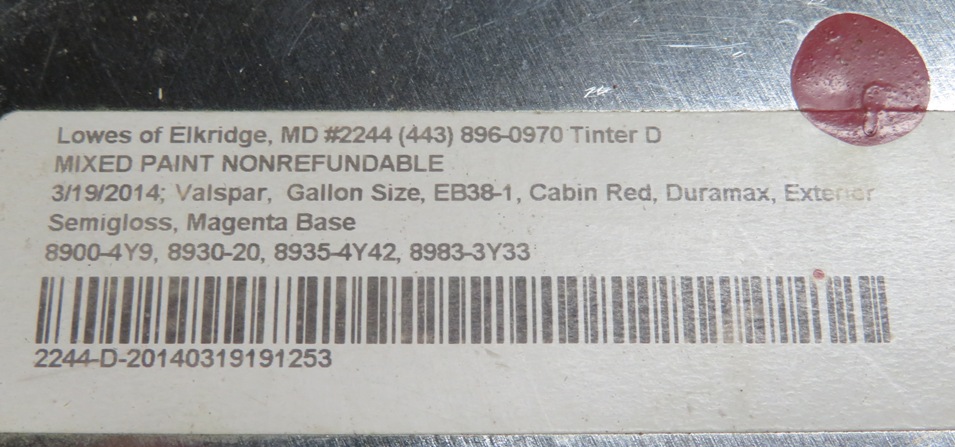
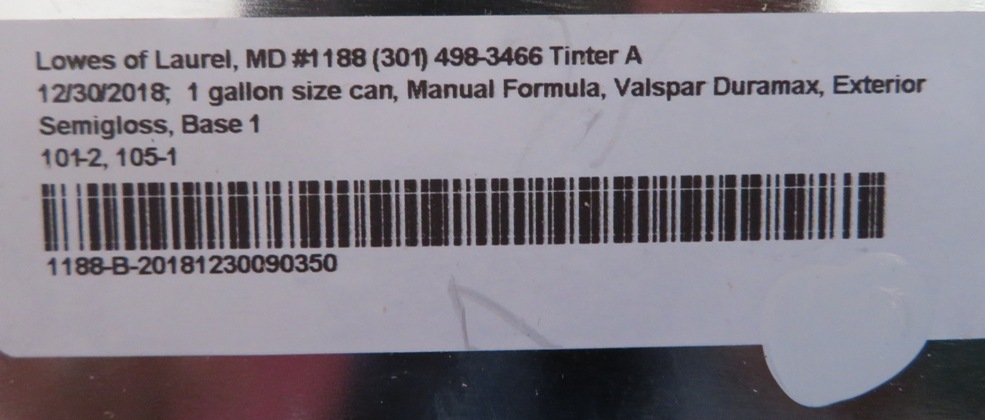
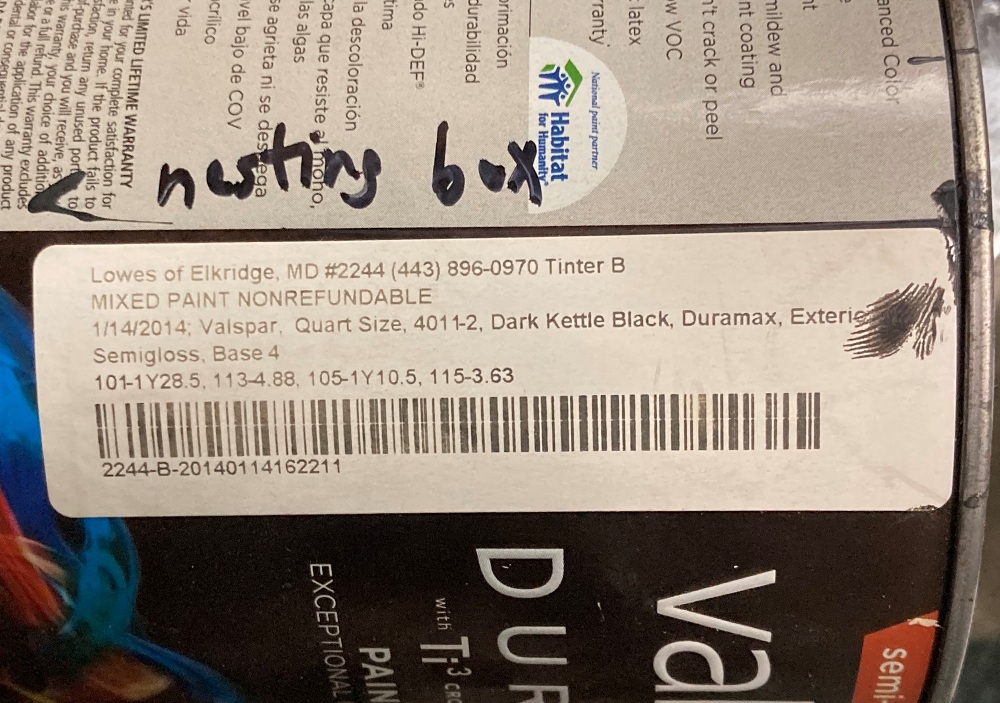
I ended up going with
Valspar Duramax from Lowe's which is about $10 cheaper per gallon than the Behr Marquee. Additionally, it has a lifetime (not 15 year) warranty. My choice of color?
Semi-gloss cabin red (uses 336704 Magenta base) for the exterior with white trim and white (77418) for the interior. The latter was obfuscated so instead I used an equivalent
white created from 77793 ultra white / tint base 1.
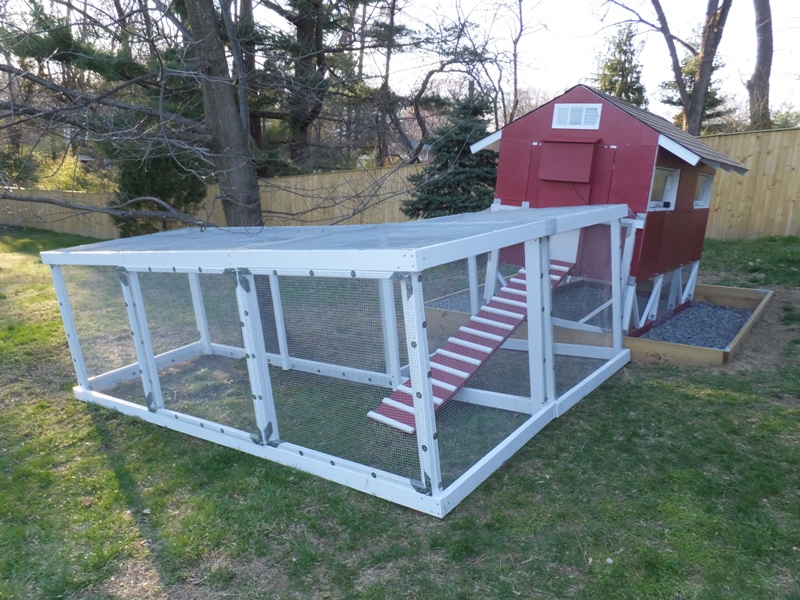
Ramp
I had a harder time finding info on building the ramp that goes from the ground to the coop door. But my source at
[48] provided some detailed blueprints. Using the inverse tangent function, I determined that the angle of this ramp is 27.76 degrees which is very good. The lower the angle, the easier it is on your chickens. One blogger tells me anything under 45 degrees is fine, another says 35-40 is good. In
[48], each step is placed 5 inches apart and each step is 1 inch high by 2 inches deep (a 1" x 2" furring strip).
One of the coop designs shown on a site related to
[48] shows 2" x 2" steps placed 7.6" apart. Another shows 2" x 2" placed 7" apart.
Another source suggests using 1" x 2" lumber spaced 4-6" apart.
Attach 1-by-2-inch pieces of lumber to the inside of the door with 1 1/4-inch screws. These pieces serve as treads to provide the chickens with additional traction as they go up the ramp. Place a tread every four to six inches along the ramp. Place the treads so the ends are at least one inch from the edge of the door on both sides [49].
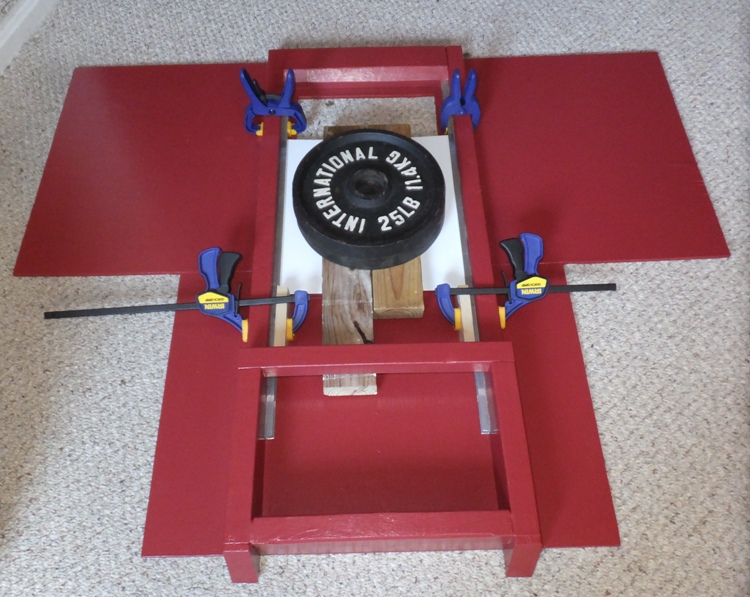
It turns out that the hardware store sells 1" x 2" furring strips but these are actually 0.75" x 1.5". This is what I used. I spaced them 6" apart and made the ramp 60" long. Later, I made an extension. The 60" long ramp is fine if the landing is on the same level as the coop. But what if it is lower? Then a longer ramp is needed. Rather than make a new ramp, I made an extension about 2 feet long. It attaches with some reinforced plywood that slides into aluminum rails. When attached, it is not obvious that the ramp is comprised of more than a single piece. The rails were attached by glue but I found it to be insufficient in supporting any pressure. So I ended up securing it with drywall screws. It isn't as smooth of a fit anymore but at least now it works.
Roost poles
Roost poles (perches) should start at 24" above the floor, 12" for silkies. You can lay them all out like a bed, or stagger them to form a ladder, rising to the top of the coop. Poles should be made from 1" square lumber, with the top edges rounded off. Too small, or too round can cause the birds foot problems. Something slippery, like PVC pipe can cause problems. Black iron pipe will freeze their feet in the winter. You should allow one square foot of roosting space for each bird. That means they should have one linear foot of pole per bird, with the poles spaced on one foot centers [2].
At least 8 inches of perching space should be allocated to each bird [18].
Unless you are keeping long-tailed breeds (which require a higher roosting point), around 2 feet off the floor is about as high as you should go, although for some of the heavier breeds such as Croad Langshans, one foot is perfect. If you use a droppings board, set it at around the heights recommended above for perches and then construct the perch about 6 inches above [18].
I assume with that last sentence, if one were to use the deep litter method, then quite a bit of stuff could build up on the droppings board so instead of building a roost up to 2 feet above the floor, you can go 2 and a half feet.
Roosts are easy to provide by securing a 2-inch closet dowel horizontally 1 to 3 feet above the floor of your coop. Some coop builders prefer to use flat or slightly rounded-edge boards for roosting. The theory is that a flatter roost allows the birds' feet to be flat instead of curled around a round perch. This may allow them to more effectively protect their feet with their warm feathers in cold weather. Provide 8 to 12 inches of roost length per bird [9].
If you need more than one perch, position the dowels or pieces of wood in a stair-step fashion with levels at least 12 to 18 inches apart. Position roosts 2 to 4 feet off the ground and 18 inches from the closest parallel wall [17].
If you need to install more than one perch, be sure to keep them at the same height or the birds will all try to roost on the higher one [18].
This stands contradictory to what I typically see in most coops with multiple roosts.
Various sources at
[3] use a 2x4 for a roosting pole with the wide side facing up. One person suggested using a railing 2x4 because it has more rounded edges. I am inclined to agree. I measured the feet of a typical Rhode Island hybrid hen at my in-law's farm. It was 3.5 inches long, not including the toenails.
Large birds [not bantams] require...around 3 inches wide and perhaps 2 inches thick [18].
...place them 2 feet above the floor and at least 18 inches from the nearest parallel wall and space them 18 inches apart. If floor space is limited, install roosts in stair-step fashion 12 inches apart vertically and horizontally, so chickens can easily hop from lower to higher rungs [23].
Allow 8" to 9" of roost space per bird.
Space roosts 12-14" apart.
1 1/2" dowels or 2x2" lumber works well [24].
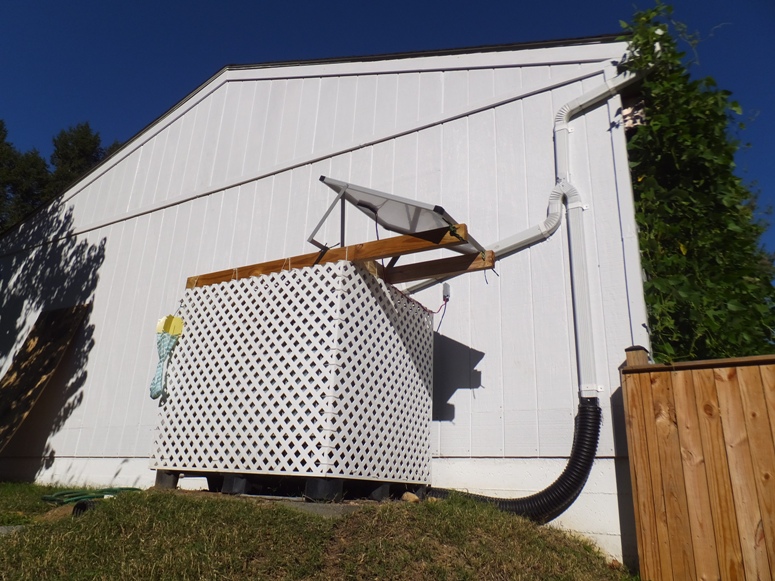
Solar panels
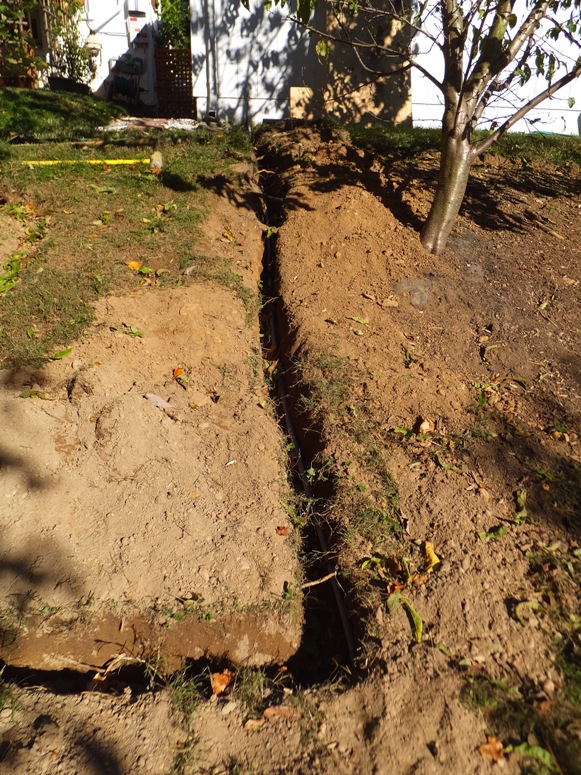
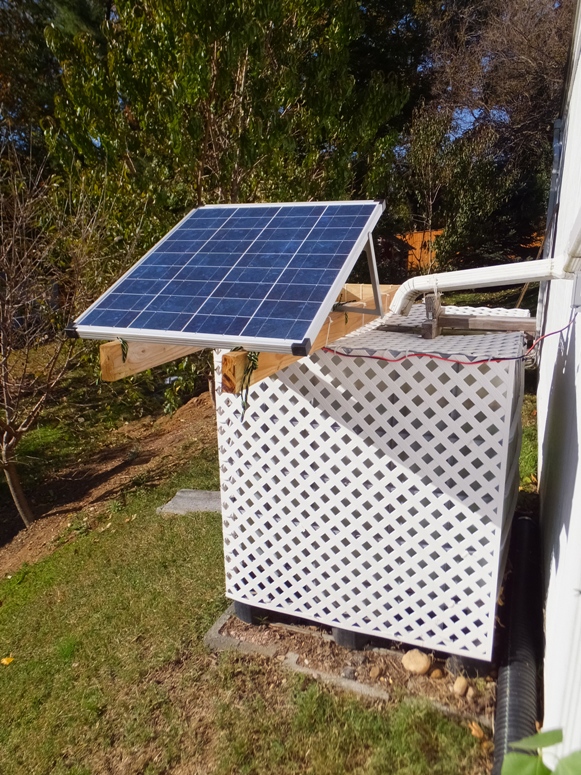
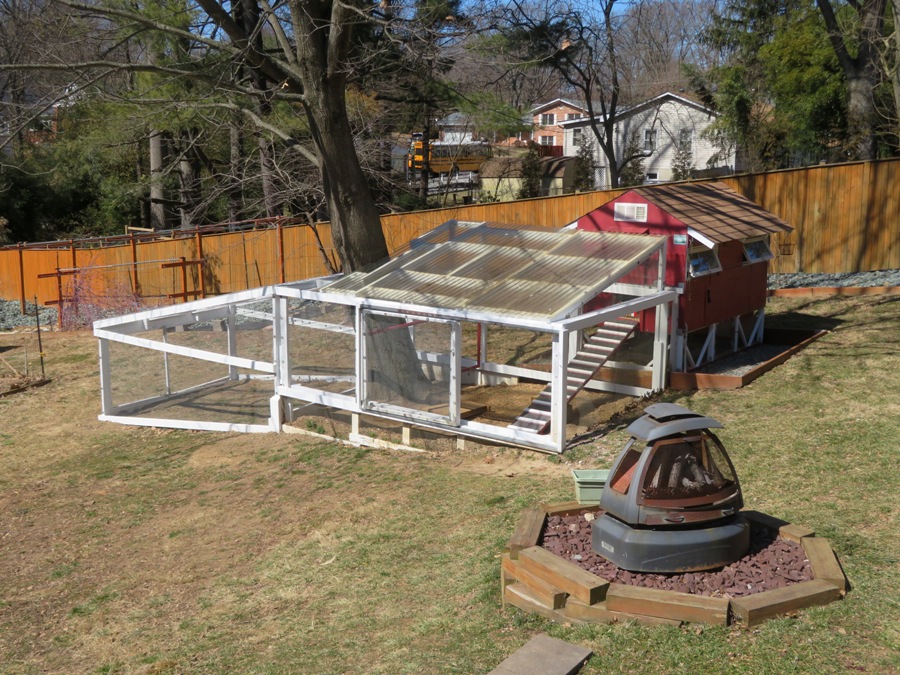
The chicken tractor will not necessarily be near the house. Nor will it be near any electrical outlets. So unless I want to run a line out to it, I'll need to have it run off the grid if I want to use any electrical devices...and I do. In order to be off the grid, I can either go solar or use wind. Our backyard is fairly sheltered from the wind so that wasn't an option. So I went solar.
In addition to the panel, one needs a battery, charge controller to prevent overcharging, and an inverter if using AC power. Since most electrical devices I would want to use are set up for AC power, I decided an inverter kept my options open.
I ended up purchasing the following:
NPower Crystalline Solar Panel Kit with Stand, Charge Controller and Inverter - 80 Watts, 12 Volt: It was a little hard to find detailed information about this but I found a very similar product (Sundance Solar - 80 Watt Do-It-Yourself Solar Energy Kit) which I used to calculate how much energy I could expect to get. If I can get five hours of direct sunlight daily, I can expect an average of 277 watt hours of electricity each day.
12v 55 ah 22NF Deep Cycle AGM Solar Battery: One source says that for the NPower Crystalline Solar Panel Kit, I should have a 50 amp-hour 12 volt Absorbed Glass Mat (AGM) sealed battery. The Sundance Solar panels include a 55 amp-hour 12 volt AGM sealed battery. Since it is important to know the effects of the weather when using batteries, I familiarized myself with Deep Cycle Battery FAQ - Temperature Effects on Batteries.
G3500 NOCO -3.5A (3500mA) Genius Smart Charger: The company recommended this charger for the battery I purchased. In the event my chickens need power but the sun isn't shining for multiple days, I can always charge the battery with AC. Hopefully that won't happen often but you never know. It is better to have it and not need it than to need it and not have it.
Xantrex Freedom SW GFCI Outlet Option Kit: The Freedom SW 2000 Inverter/Charger is offered with the GFCI (Ground Fault Circuit Interrupter) option to enable you to plug electronics directly on the inverter/charger. I considered purchasing this but never did.
One of my inspirations for choosing to have a coop that is off the grid is
The First LEED Certified Backyard Chicken Coop (now a broken link).
Space
No less than 3 to 5 square feet per bird. 10 square feet per bird would be better [2].
Of the cities that have promulgated shelter requirements specific to chickens, nine of them mandate that each chicken be given a specific amount of space. Of these cities, the average amount of space per chicken is five square feet [1].
In the model ordinance written by Jaime M. Bouvier, a coop should
allow at least two square feet per hen [1].
Regarding space requirements for chickens,
the mainstream answer is 4 square feet indoor and 10 square feet of run for each bird [4] [5].
One person says this specification is mentioned in
Storey's Guide for Raising Chickens by Gail Damerow.
A layer hen occupies two square feet inside the coop and eight square feet outside. The rooms where the chickens stay should have a distance of three square feet from each other. This means that if ten layer hens will be kept in the building, the coop should have at least 47 square feet inside and 80 square feet outdoor run. A bantam chicken occupies a square foot inside the building and four square feet outside. A large chicken should have at least two square feet of space inside and ten square feet in the outdoor run [6].
Each adult bird will need 3-4 square feet of space [8].
How much vertical space is required in a coop is something that isn't discussed so often. 18" above the roost seems to be the standard answer
[3]. Another source says
A height of 24" is adequate; add another 6" for roosts [13].
Ventilation
A coop must be well ventilated.
"Well ventilated" means that there must be a good exchange of fresh air to dry the droppings and keep the ammonia smell down. If a pen is too tight [i.e. doesn't breathe], the ammonia from droppings can cause your birds to develop respiratory problems, and can blind them. A coop does not need to be insulated, but if it is, the insulation needs to be inside walls, otherwise chickens will pick it to shreds [2].
DON'T seal up the chicken coop and make it air-tight in the winter. While drafts are bad, lots of ventilation for constant air exchange is absolutely necessary to a healthy winter coop environment. Moisture must be removed from the coop even if it means losing some heat [25].
Water
Chickens need access to water at all times and will consume one to two cups of water per day each [20].
Do they really need access to water at
all times? I get up at night to get a drink but do chickens? During cold nights, one source suggests bringing the fount indoors.
Don't worry about your chickens getting thirsty at night - they are so sedate and immobilized in the dark, they won't even notice that their water is missing [9].
Where should water be kept?
Chickens are notorious for drinking with food in their mouths and kicking litter into the trough. Alleviate both problems by moving founts away from feeders and raising them off the floor to the chickens' chest level [20].
DON'T keep waterers inside the coop. Moisture is the winter enemy inside the chicken coop. Keep water in the run [25].
Be aware of water freezing. You may want to invest in a water heater.
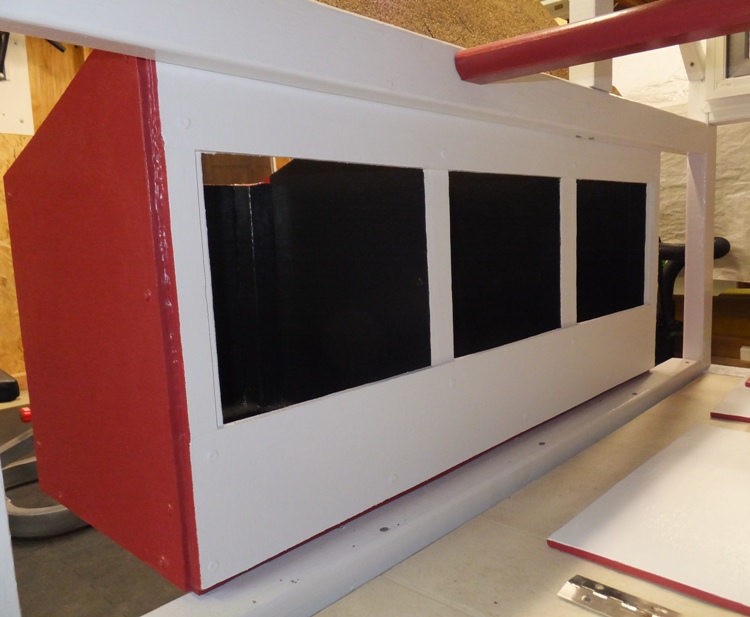
Windows
Approximately one-fifth of the available wall space should be given over to windows [19].
Provide at least one square foot of window for each 10 square feet of floor space. They should be fitted with screens of 1/2 or 3/4 inch hardware cloth [23].
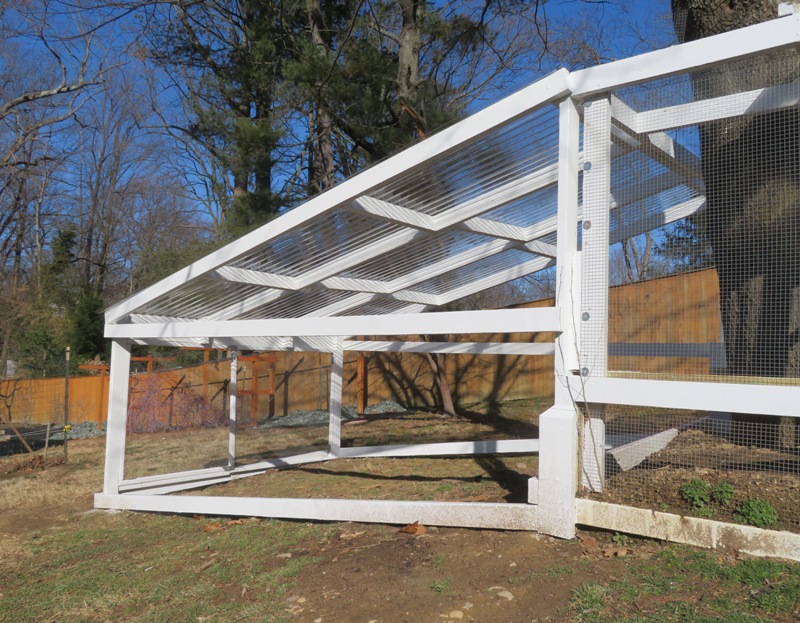
The next question is where to place the windows. Anyone who has studied energy efficient home construction can tell you that positioning the windows relative to the roof overhang will help ensure sun shines through in the winter, mornings, and evenings when the sun is low but not during the hottest part of a summer day when it is hot.
Cold climates (with more than 6,000 Heating Degree Days, base 65 degrees F/18 degrees C): use the June 21 sun angle, and locate the overhang shadow line at mid-window.
Temperate climates (below 6,000 Heating Degree Days, base 65 degrees F/18 degrees C, and below 2,600 Cooling Degree Days, base 75 degrees F/22 degrees C): use the June 21 sun angle, and locate the overhang shadow line at the window sill [bottom part of window].
Hot climates (above 2,600 Cooling Degree Days, base 75 degrees F/22 degrees C): use the March 21 sun angle, and locate the shadow line at the window sill [29].
Here in the Baltimore area, we get about 4750 heating degree days and 1000 cooling degree days, making us a temperate climate
[30]. Of course, one must ask if the chickens think we live in a temperate climate. I mentioned earlier that
The optimum temperature for chickens is between 45 and 80 degrees Fahrenheit [20].
In the Baltimore area, we have 4 months out of the year where the average high temperature is above 80 degrees and 5 months out of the ear where the average low is below 45 degrees
[31]. Additionally,
Since 1871, the mean temperature for Baltimore has been 54.6 degrees Fahrenheit [32].
So I think it is safe to assume that the chickens might agree that we live in a temperate climate. I wrote this in 2014 so it might be outdated due to climate change in a few years.
Going back to the original question of where to place the windows, we need to consider the June 21 sun angle. For June 21, 2014 (the summer solstice), the sun angle is 74.18 degrees at noon
[28]. This means the window must be placed in a position relative to the overhang of the roof so that the entire window is shaded when the sun is highest on the longest day of the year.
One might argue that we should build for a hot climate since chickens do better in cold weather than us wimpy humans. If we do that, then we consider the spring equinox sun angle which for March 20, 2014 is 50.72 degrees at noon
[28]. This means the window must be placed in a position relative to the overhang of the roof so that the entire window is shaded when the sun is highest on the first day of spring.
Realistically, I think anywhere between the solstice and equinox choices is reasonable. I ended up going with about 54 degrees.
Wood
Use pressure-treated lumber for wood in contact with ground [24].
Most people do in fact use treated wood when building a coop or run for their chickens. To date, no harmful effects have been reported. Home studies, as well as those done by professionals including the Texas A&M Agricultural Extension Service, have shown that the compounds used in pressure-treated lumber are unlikely to leach into the soil, even after a prolonged period of exposure to the elements. In 2003, the EPA ruled that no wood-treater or manufacturer could treat wood with CCA (a chemical wood preservative containing chromium, copper and arsenic) for home use. Thus, the lumber available for building today is safer than that used in years past [10].
The one drawback to using pressure treated wood is that you can't call your eggs
organic.
Did you know that in order to sell eggs with the word "organic" on them the chickens can't have any access to treated lumber, or be on ground which has come into contact with treated lumber for three years? That means any posts for fences, or posts for your coop or your deck or any out buildings cannot have any treated lumber exposed to the chickens or the ground they walk on, including the pastures they walk in [3].
I looked around for inexpensive lumber, windows, wheels, and other building materials. Second hand building supplies can be found at
Second Chance: Baltimore City. This place is HUGE! They have a lot of vintage stuff that probably came from the older sections of the city. If weight were of no concern (i.e. if I were not building a chicken tractor), then I might have some use for this stuff but everything looked pretty heavy.
ReStore: Columbia, Howard County. This place is pretty small. They have a good selection of cabinets and full size doors but nothing I could use for a coop.
The Loading Dock: Baltimore City.
Community Forklift: Edmonston, Prince George's County.
I ended up deciding to use a lot of 2x3 beams for the frame. They would be a lot lighter than 2x4s. I couldn't find any of this at the above stores so I just shopped at Home Depot. Unfortunately, there were no pressure treated 2x3s so I made sure to use good exterior paint to protect it.


